You know how some of the best recipes happen by accident? Well, these Silky Keto Lemon Bars weren’t exactly an accident, but they definitely evolved. I was on a mission to create a lemon bar that was truly keto, didn’t taste “diet-y,” and had that perfect, luscious, wobbly-but-set filling. My first few batches were… okay. Some were too eggy, others had a crust that crumbled into oblivion. Then, one sunny afternoon, I was playing around with the ratio of eggs in the filling, and I decided to be a bit more generous with the fresh lemon juice and zest, really leaning into that bright flavor. And BINGO! The texture was unbelievably silky, the flavor was a perfect sweet-tart explosion, and the almond crust held up beautifully. My taste-testers (aka my family) devoured them, and I knew I had a winner.
So, why should you drop everything and make these? Well, if you’re looking for a truly refreshing dessert that won’t kick you out of ketosis, this is it. They’re elegant enough for a gathering but simple enough for a Tuesday afternoon pick-me-up. Plus, that bright yellow color? Pure happiness on a plate!
Why This Recipe Is A Keeper
I could go on and on, but here’s why I think you’ll fall in love with these Silky Keto Lemon Bars:
That Unbelievably Silky Filling: We’re not kidding around with the name! The custard filling is incredibly smooth and melts in your mouth, with a vibrant lemon kick.
Perfectly Balanced Flavor: It’s that classic sweet-tart lemon flavor you crave, but made keto-friendly with allulose. No weird aftertaste, just pure lemon bliss.
Easy, No-Fuss Almond Crust: The almond flour base comes together in minutes and provides the perfect tender-crisp contrast to the creamy topping.
What You’ll Need
Here’s your shopping list. Grab fresh lemons if you can – the zest and juice make all the difference!
For the Almond Shortbread Base:
3 cups blanched almond flour (approx. 288g) – Fine blanched almond flour gives the best texture!
4 ½ tablespoons allulose – My go-to for keto baking, it behaves a lot like sugar.
¼ teaspoon salt – Don’t skip it, it balances the sweetness.
1 large egg
1 large egg yolk – This adds richness to the crust.
For the Luscious Lemon Topping:
9 large eggs – Yes, nine! This is key for that incredible custard.
1 cup allulose
1 cup fresh lemon juice (from approximately 4-6 lemons) – Freshly squeezed is a game-changer!
1 ½ teaspoons lemon zest (from approximately 2-3 lemons) – This is where so much bright lemon flavor comes from.
½ teaspoon vanilla extract – A little vanilla rounds out the flavors beautifully.
Let’s Get Baking! Step-by-Step to Lemon Heaven
Alright, roll up your sleeves – it’s easier than you think!
Preheat Oven & Prepare Pan: First things first! Position an oven rack in the center and preheat your oven to 350°F (180°C). Line an 8×12-inch (or a similar 9×11-inch) baking pan with parchment paper. Leave an overhang on two opposite sides – this will be your secret weapon for lifting the bars out easily later.
Create Shortbread Base: In a medium bowl, whisk together the almond flour, 4 ½ tablespoons of allulose, and salt. Add the large egg and large egg yolk. Get in there with a spatula or your hands and mix until a cohesive dough forms.
Press & Pre-bake Base: Transfer that lovely dough into your prepared pan. Press it down firmly and evenly across the bottom to create a uniform crust. Pop it into the preheated oven for 14-17 minutes. You’re looking for the base to be set and the edges just starting to turn a light golden color.
Mix Lemon Topping: While the base is having its first bake, let’s whip up that dreamy lemon topping. In a separate large bowl, gently whisk the 9 large eggs until the yolks and whites are thoroughly blended but not foamy – we don’t want too many air bubbles, or the top might crack. Gradually whisk in the 1 cup of allulose until it looks mostly dissolved. Now, stir in the fresh lemon juice, lemon zest, and vanilla extract. Mix until everything is just combined. Again, avoid over-mixing!
Combine Layers: Once the shortbread base is lightly baked, carefully take it out of the oven. Promptly and gently pour the prepared lemon topping mixture over the warm base. Tilt the pan a bit if needed to make sure it spreads out to cover the entire surface evenly.
Bake Until Set: Return the pan to the oven. Now, bake for an additional 20-25 minutes. The magic moment is when the edges of the lemon topping are set, and the center has only a very slight wobble. It shouldn’t look liquid, but don’t worry if it’s not rock solid – it will continue to firm up as it cools.
Cool Completely & Chill (The Hardest Part!): Carefully take the pan from the oven and place it on a wire cooling rack. Let those gorgeous lemon bars cool completely to room temperature right there in the pan. This is crucial! Once they’re at room temperature, cover the pan (plastic wrap works fine) and transfer it to the refrigerator. Chill for a minimum of 3 hours, or ideally overnight. This allows them to set fully and for those amazing flavors to meld. Patience, my friend!
Slice and Serve: The wait is over! Once thoroughly chilled and firm, use those handy parchment paper overhangs to lift the entire block from the pan. Place it on a cutting board. Using a sharp knife (pro tip: wiping the blade clean between cuts helps get those nice, neat squares), slice into 18 even bars. A 3×6 grid works perfectly.
My Expert Tips for Lemon Bar Success
Sweetener Swaps: While allulose is fantastic here for its sugar-like properties and minimal cooling effect, you could experiment with other keto-friendly granulated sweeteners. Just be aware that texture and taste might vary, and some sweeteners can recrystallize more easily upon chilling.
Don’t Overbake! This is the number one tip for a silky, not rubbery, lemon filling. That slight wobble in the center when you pull it from the oven is exactly what you want.
Chill, Chill, Chill: I know it’s tempting to dive in, but proper chilling is non-negotiable for these bars to set up correctly and for easy slicing.
Fresh Lemon is Best: Bottled lemon juice just doesn’t compare to the bright, zesty flavor of freshly squeezed. Plus, you need fresh lemons for the zest anyway!
Storage Savvy:
Refrigerator: Store leftover lemon bars in an airtight container in the refrigerator. They will remain fresh and delicious for up to 1 week.
Freezer: Want to save some for a rainy day? Arrange the sliced bars in a single layer on a baking sheet and freeze until solid. Once frozen, transfer them to a freezer-safe ziplock bag or an airtight container, separating layers with parchment paper if you like. They can be stored in the freezer for up to 3 months. Thaw them overnight in the refrigerator before enjoying.
Serving & Pairing Perfection
These Silky Keto Lemon Bars are pretty fantastic all on their own, but here are a few ideas to dress them up:
A dollop of keto-friendly whipped cream (unsweetened or lightly sweetened with allulose).
A few fresh berries on the side, like raspberries or blueberries, for a pop of color and extra antioxidants.
Serve them as a light dessert after a summer barbecue or a cozy dinner.
They’re a star at potlucks, brunches, or as an afternoon treat with a cup of tea or coffee.
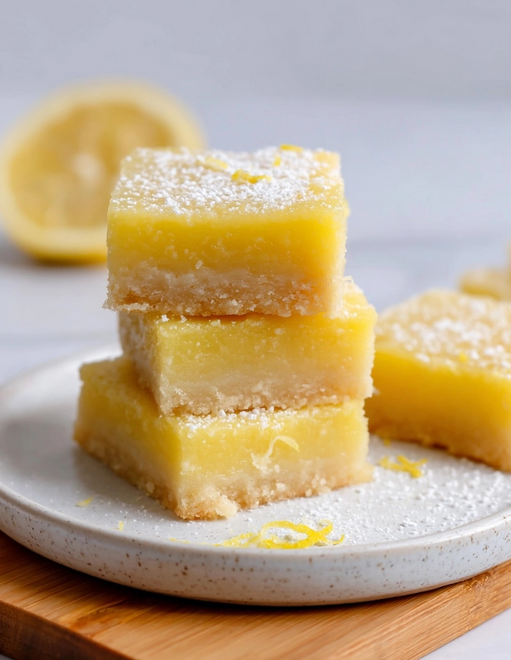
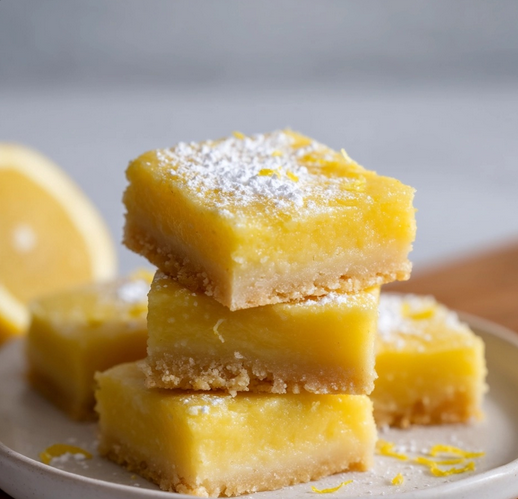
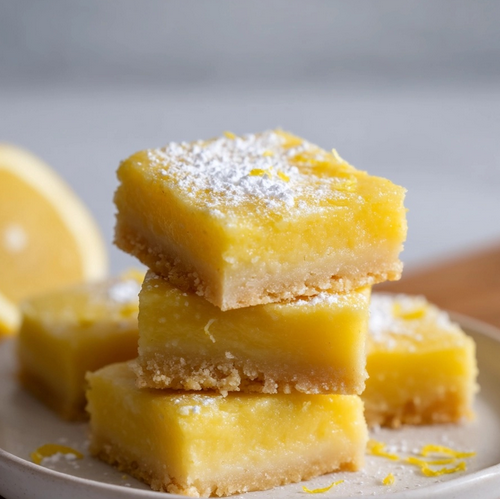
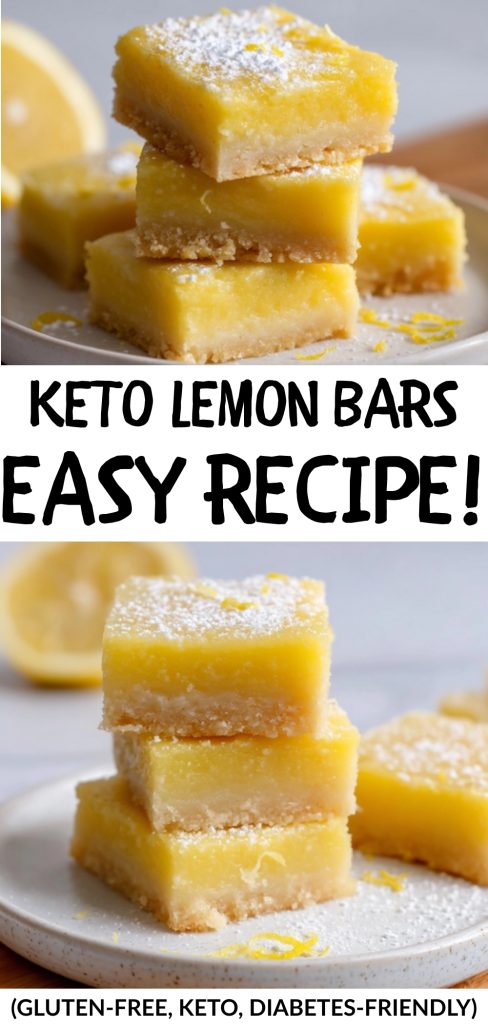
Silky Keto Lemon Bars
Indulge in these Silky Keto Lemon Bars, featuring a smooth, zesty lemon custard nestled atop a tender almond-flour shortbread crust. Wildly refreshing and perfectly keto-friendly, these bars are a delightful treat for anyone managing carbohydrate intake, offering a burst of sunshine in every bite.
1cupfresh lemon juicefrom approximately 4-6 lemons
1 ½teaspoonslemon zestfrom approximately 2-3 lemons
½teaspoonvanilla extract
Instructions
Preheat Oven & Prepare Pan: Position an oven rack in the center and preheat your oven to 350°F (180°C). Line an 8x12-inch (or a similar 9x11-inch) baking pan with parchment paper, leaving an overhang on two opposite sides to allow for easy removal of the bars later.
Create Shortbread Base: In a medium bowl, whisk together the almond flour, 4 ½ tablespoons of allulose, and salt. Incorporate the large egg and large egg yolk, mixing with a spatula or your hands until a cohesive dough forms.
Press & Pre-bake Base: Transfer the dough into the prepared pan. Press it down firmly and evenly across the bottom to create a uniform crust. Bake in the preheated oven for 14-17 minutes, or until the base is set and the edges are just beginning to turn a light golden color.
Mix Lemon Topping: While the base is baking, prepare the lemon topping. In a separate large bowl, gently whisk the 9 large eggs until the yolks and whites are thoroughly blended but not foamy. Gradually whisk in the 1 cup of allulose until it appears mostly dissolved. Stir in the fresh lemon juice, lemon zest, and vanilla extract, mixing until all ingredients are just combined. Avoid over-mixing to prevent excess air bubbles.
Combine Layers: Once the shortbread base is lightly baked, carefully remove it from the oven. Promptly and gently pour the prepared lemon topping mixture over the warm base, ensuring it spreads out to cover the entire surface evenly.
Bake Until Set: Return the pan to the oven. Continue to bake for an additional 20-25 minutes. The lemon bars are ready when the edges of the lemon topping are set and the center has only a very slight wobble (it should not appear liquid but will continue to firm up as it cools).
Cool Completely & Chill: Carefully take the pan from the oven and place it on a wire cooling rack. Allow the lemon bars to cool completely to room temperature while in the pan. Once at room temperature, cover the pan (e.g., with plastic wrap) and transfer to the refrigerator. Chill for a minimum of 3 hours, or ideally overnight, to allow them to set fully and for the flavors to meld beautifully.
Slice and Serve: Once thoroughly chilled and firm, use the parchment paper overhangs to lift the entire block from the pan. Place it on a cutting board and, using a sharp knife (wiping the blade clean between cuts can help), slice into 18 even bars (for example, a 3x6 grid).
Notes
Refrigerator: Store leftover lemon bars in an airtight container in the refrigerator. They will remain fresh for up to 1 week.
Freezer: For extended storage, arrange the sliced bars in a single layer on a baking sheet and freeze until solid. Once frozen, transfer them to a freezer-safe ziplock bag or an airtight container, separating layers with parchment paper if desired. They can be stored in the freezer for up to 3 months. Thaw overnight in the refrigerator before enjoying.
Approximate Nutritional Information (per bar, 1/18 of recipe)
Calories: 146
Protein: 7.1 g
Fat: 11.4 g
Total Carbohydrates: 16.5 g
Fiber: 1.8 g
Allulose: 11.9 g
Net Carbohydrates: 2.9 g
Nutritional information is calculated using an online nutritional calculator and is approximate. Values may vary based on specific ingredients and brands used.
You’ve GOT to Try These!
Seriously, if you’re looking for a keto dessert that feels truly indulgent and special, these Silky Keto Lemon Bars are it. They’re bright, they’re creamy, and they’re guaranteed to bring a little sunshine to your day.
I’m so excited for you to try this recipe! If you make them, I’d absolutely love to see! Tag me in your photos on social media or drop a comment below and let me know how they turned out. Happy baking!