
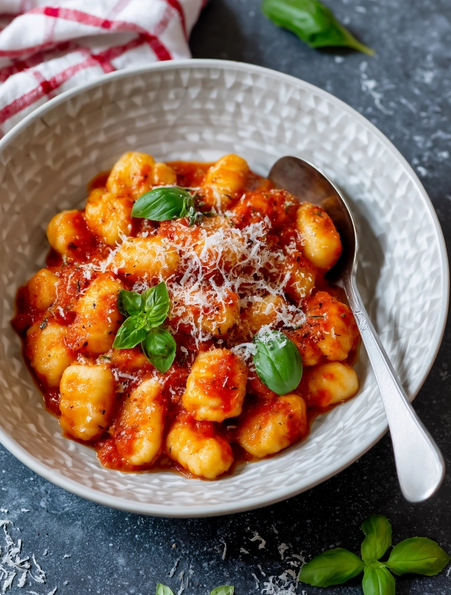
You know those kitchen moments that start as a bit of an experiment and end up being a total game-changer? That’s exactly how these Viral Cloud-Keto Cauliflower Gnocchi came to be in my life! I was deep into a keto phase, seriously missing my pasta nights, and had heard whispers about cauliflower gnocchi. My first few attempts were… well, let’s just say they were rustic. Then, one day, I was probably a bit frustrated (or maybe just really determined!), and I squeezed the daylights out of the steamed cauliflower. Like, way more than I thought was necessary. And voilà! The texture transformed. Suddenly, these light, pillowy, tender little dumplings emerged, and I swear, I did a happy dance right there in my kitchen.
If you’re looking for that comforting, satisfying gnocchi experience but want to keep it low-carb and keto-friendly, you are in the RIGHT place. Or, even if you’re just curious about a ridiculously tasty way to eat more veggies, these are for you. They’ve become such a hit, I just had to share them!
Why This Recipe Will Wow You (And Your Taste Buds!)
So, what’s the big deal about these cauliflower gnocchi? Let me count the ways:
- Cloud-Like Texture Perfection: Seriously, the name doesn’t lie. The key is getting that cauliflower super dry and a little help from a secret weapon (psyllium husk!). This gives them an unbelievably light, tender, almost melt-in-your-mouth feel that’s miles away from some of the denser versions out there.
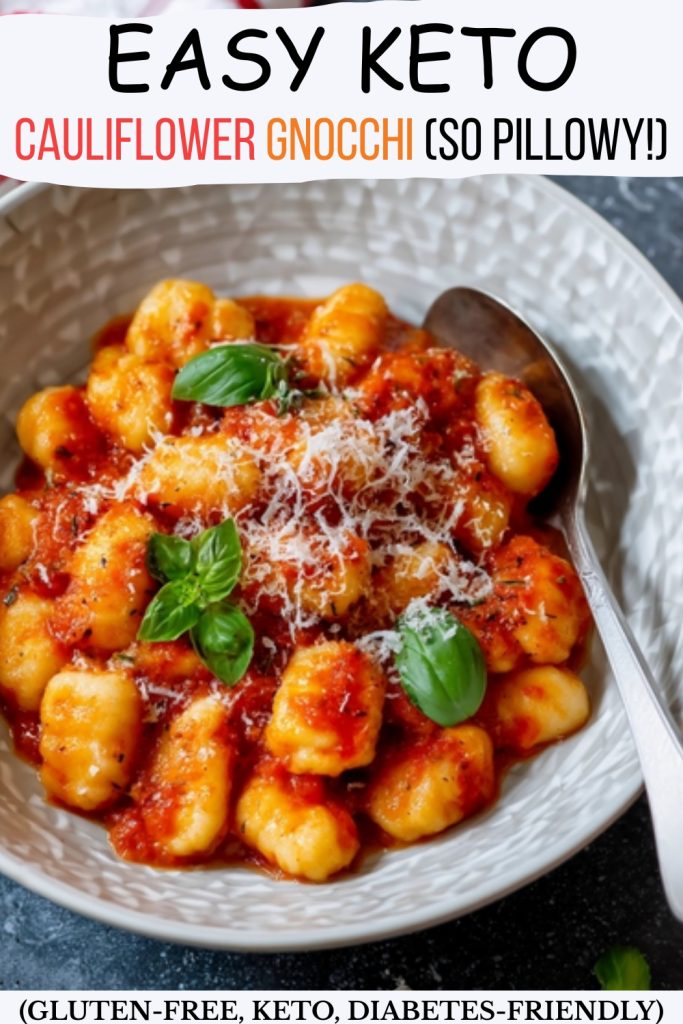
- Seriously Keto, Seriously Delicious: We’re talking around 6 net carbs for a generous serving. Yes, really! But here’s the best part – they don’t taste like diet food. They’re rich, savory, and utterly satisfying. Everyone at the table will be reaching for more, keto or not!
- Surprisingly Simple to Master: Homemade gnocchi can sound a bit intimidating, right? But trust me, this recipe breaks it down into easy, manageable steps. A little bit of mixing, a little bit of rolling, and you’re on your way to gnocchi nirvana.
Ingredient Breakdown: Your Shopping List
Getting the right ingredients is the first step to gnocchi perfection! Here’s what you’ll need, along with a few handy tips for each item:
- 4 and 1/2 cups Cauliflower Rice: (This is about 480g, from roughly 1 large head of cauliflower). Freshly riced is fantastic, but good quality frozen riced cauliflower works well too. Just remember, if it’s frozen, thaw it completely and then drain it like your recipe depends on it (because it truly does for the best texture!).
- 3 Large Egg Yolks: These are absolutely key for providing richness and helping to bind your gnocchi dough together.
- 1 and 1/2 cups Freshly Grated Parmesan Cheese: (This is around 150g). For the ultimate flavor and melt, I always recommend grating your own Parmesan cheese directly from a block. The pre-grated versions often contain anti-caking agents that can subtly alter the final texture of your gnocchi.
- 3 cups Shredded Full-Fat, Low-Moisture Mozzarella Cheese: (Approximately 339g). This is what gives the gnocchi their delightful, slightly chewy texture and is crucial for helping them hold together beautifully during cooking.
- 9 tablespoons Fine Blanched Almond Flour: (This is about 63g). Using almond flour keeps our gnocchi wonderfully low-carb and gluten-free, and it contributes significantly to their tender, delicate structure. You’ll also want a little extra on hand for dusting your work surface.
- 1 and 1/2 teaspoons Psyllium Husk Powder: Think of this as a bit of a keto kitchen superhero! It’s fantastic for binding ingredients together and achieving that perfect, almost cloud-like gnocchi texture. Please make sure you’re using the fine powder form, not the whole husks.
- 3/4 teaspoon Garlic Powder: This adds a lovely, subtle savory warmth to the gnocchi, enhancing all the other flavors. (Note: “3/4” means three-quarters of a teaspoon).
- Salt (for the boiling water): Don’t forget this important step! Seasoning the cooking water generously is crucial, just like when you’re making traditional pasta, as it seasons the gnocchi perfectly from the inside out.
You’ll also need some pretty standard kitchen equipment: a couple of large mixing bowls, a microwave (or a steamer setup), a plate or small baking sheet (lining it with parchment paper is your friend here!), something to cut the gnocchi (a bench scraper or knife), an optional fork for those classic ridges, a large pot, and a slotted spoon.
Step-by-Step to Gnocchi Heaven!
Alright, let’s roll up our sleeves and make some gnocchi magic!
- Steam & Squeeze That Cauliflower! This is probably THE most important step for amazing texture. Place your cups of cauliflower rice into a large microwave-safe bowl. Steam it on high in the microwave for 3-5 minutes, or until it’s very tender. (No microwave? No problem! Steam it in a steamer basket over boiling water for about 5-7 minutes.) Now, carefully (it’ll be hot!) drain it thoroughly. Transfer the hot cauliflower to the center of a clean kitchen towel (a thin, non-terry cloth one works best) or several layers of heavy-duty paper towels. Gather up the sides and wring out as much moisture as humanly possible. Seriously, pretend you’re trying to get water from a stone. The drier your cauliflower, the better your gnocchi will be. Once squeezed, put this surprisingly small amount of dry cauliflower into a large mixing bowl.
- Combine the Base Ingredients: To the bowl with your super-dry cauliflower, add the 9 tablespoons of almond flour, teaspoons of psyllium husk powder, teaspoon of garlic powder, the 3 egg yolks, and your cups of freshly grated Parmesan cheese. Grab a sturdy spatula or a wooden spoon and stir everything together vigorously until it’s really well combined and forms a kind of coarse, slightly crumbly mixture.
- Melt the Mozzarella & Form the Dough: In a separate microwave-safe bowl, melt your 3 cups of shredded mozzarella cheese. I like to do this in 30-second intervals, stirring after each one, until it’s perfectly smooth and gloriously melted (this usually takes 1-2 minutes total). You can also do this gently in a small non-stick saucepan over very low heat. As soon as it’s melted, immediately pour that molten mozzarella into the cauliflower mixture. Now, work quickly while it’s hot! Mix everything together robustly with your spatula until a cohesive, somewhat sticky dough forms.
- The Initial Chill: This dough can be a bit sticky when warm, so a quick chill helps. Lightly moisten your hands with a little water or grease them with a tiny bit of olive oil. Divide the warm dough into 6 equal portions and quickly roll each one into a ball. Place these dough balls onto that parchment paper-lined plate or baking sheet you prepared, cover them with plastic wrap, and pop them into the refrigerator for 12-15 minutes. This will make them much easier to handle for shaping.
- Shape Your Little Clouds: Lightly dust a clean, dry work surface with a tiny bit of extra almond flour (not too much!). Take one chilled dough ball out at a time, keeping the others in the fridge so they stay firm. On the lightly floured surface, gently roll the ball into a long, smooth log, about to -inch in diameter. Using your bench scraper or a sharp knife, cut the log into bite-sized pieces – I like mine about -inch to 1-inch long. If you want to get fancy and add those classic gnocchi ridges (which also help hold onto sauce!), you can gently press the tines of a fork onto one side of each piece, or roll them over a gnocchi board if you have one.
- The Final Chill for Fabulous Form: As you shape each little gnocchi, arrange them in a single layer on your parchment-lined plate or baking sheet, making sure they aren’t touching (we don’t want them to stick together!). Once all your gnocchi are shaped, cover them loosely and return them to the refrigerator for at least 25-30 minutes. You can even leave them for a few hours at this stage if you’re prepping ahead! Don’t skip this final chill; it’s really important to help them keep their beautiful shape when they hit the hot water.
- Time to Cook! Bring a large pot of water to a full rolling boil, and add a generous pinch of salt (think sea-salty, so about 1 tablespoon for a 4-6 quart pot). Gently drop your chilled gnocchi into the boiling water. It’s important not to overcrowd the pot, so cook them in 2 or 3 batches if necessary. Give them one gentle stir right after you add them to make sure they don’t stick to the bottom of the pot. These little guys cook incredibly quickly – usually just 1-2 minutes! You’ll know they’re perfectly done when they float up to the surface.
- Serve and Swoon: As soon as your gnocchi float to the top, promptly remove them with a slotted spoon, allowing any excess water to drain off. Now, serve them immediately while they’re hot and pillowy!
Expert Tips for Gnocchi Glory
A few little tricks I’ve learned along the way:
- Dry, Dryer, Driest! I know I sound like a broken record, but squeezing every last bit of moisture from the cauliflower in Step 1 is the absolute non-negotiable secret to light, non-gummy gnocchi.
- Psyllium is Your Pal: That psyllium husk powder really is a bit of a wonder for keto cooking, giving an almost magical bind and texture. If you can’t find the fine powder, you can try grinding whole husks in a spice grinder.
- Cheese Matters: Using good quality, freshly grated Parmesan and full-fat, low-moisture mozzarella makes a noticeable difference in both the flavor and the way the gnocchi come together.
- Handle with Care: The dough is softer than traditional potato gnocchi dough. Be gentle when rolling and shaping. A little stickiness is okay; too much flour will make them heavy.
- Batch Cook for Best Results: When boiling, giving the gnocchi plenty of room to dance in the water helps them cook evenly and prevents them from clumping.
- Storage & Reheating Wisdom:
- Fridge: Let any leftover cooked gnocchi cool completely. Store them in an airtight container in the refrigerator, ideally in a single layer or with parchment paper between layers to stop them from sticking. They’ll keep well for up to 3 days.
- Freezer (Uncooked for Meal Prep!): This is a fantastic option! Arrange your freshly shaped, uncooked gnocchi in a single layer on a parchment-lined baking sheet. Pop them in the freezer until they’re solid (this usually takes about 1-2 hours). Once frozen solid, transfer them to a freezer-safe bag or container, squeezing out as much air as possible. They’ll keep in the freezer for up to 3 months! Cook them directly from frozen – just add an extra minute or two to the boiling time.
- Reheating Cooked Gnocchi: The absolute best way to reheat cooked gnocchi is to give them a quick pan-fry! Melt a little butter or heat a touch of olive oil in a non-stick skillet over medium heat. Add the gnocchi and cook, tossing occasionally, until they’re warmed through and perhaps a little golden and crispy on the outside. Trust me, avoid the microwave for these – it can make them a bit too soft or even rubbery.
Serving Suggestions & Perfect Pairings
These little cauliflower clouds are fantastic with so many things!
- My personal favorite is a simple toss with a quality keto-friendly marinara sauce or a vibrant pesto.
- For an elegant touch, try a classic browned butter and sage sauce. Just melt some butter until it’s nutty and golden, then toss in a few fresh sage leaves until crispy. Heavenly!
- They make a wonderful side dish to grilled chicken, fish, or a lovely steak.
- Want to keep it super simple? A drizzle of good quality extra virgin olive oil, a crack of black pepper, and an extra grating of Parmesan cheese is sometimes all you need.
- For a cozy, comforting meal, serve them with a side of a simple green salad tossed with a zesty lemon vinaigrette.
Viral Cloud-Keto Cauliflower Gnocchi
Equipment
- Large microwave-safe bowl
- Second microwave-safe bowl (or small saucepan for stovetop cheese melting)
- Large mixing bowl
- Plate or small baking sheet (parchment paper-lined, recommended)
- Bench scraper or knife
- Fork (optional, for shaping)
- Large pot
- Slotted spoon
Ingredients
Produce:
- 4½ cups approx. 480g cauliflower rice, from about 1 large head of cauliflower (freshly riced or frozen, thawed and thoroughly drained)
Dairy & Eggs:
- 3 large egg yolks
- 1½ cups approx. 150g freshly grated Parmesan cheese
- 3 cups approx. 339g shredded full-fat, low-moisture mozzarella cheese
Pantry & Seasonings:
- 9 tablespoons approx. 63g fine blanched almond flour, plus extra for dusting
- 1½ teaspoons psyllium husk powder
- ¾ teaspoon garlic powder
For Cooking:
- Salt for boiling water
Instructions
- Steam & Dry Cauliflower: Place the cauliflower rice into a large, microwave-safe bowl. Steam in the microwave on high for 3-5 minutes, or until the cauliflower is very tender. (Alternatively, steam in a basket over boiling water for 5-7 minutes). Carefully remove and drain thoroughly. Transfer the hot cauliflower to a clean kitchen towel or several layers of sturdy paper towels and wring out as much moisture as possible – this step is crucial for the best texture. Place the dried cauliflower into a large mixing bowl.
- Combine Base Ingredients: To the bowl with the dried cauliflower, add the almond flour, psyllium husk powder, garlic powder, egg yolks, and grated Parmesan cheese. Stir vigorously with a firm spatula or wooden spoon until all ingredients are well combined and form a coarse mixture.
- Melt Mozzarella & Form Dough: In a separate microwave-safe bowl, melt the shredded mozzarella cheese in 30-second intervals, stirring in between, until smooth and fully melted (typically 1-2 minutes total). Alternatively, melt gently in a small non-stick saucepan over low heat. Immediately pour the molten mozzarella into the cauliflower mixture. Mix robustly and quickly until a cohesive, somewhat sticky dough forms.
- Initial Chill: Lightly moisten your hands with water or grease them with a touch of olive oil. Divide the warm dough into 6 equal portions and quickly roll each into a ball. Place the dough balls onto a parchment paper-lined plate, cover with plastic wrap, and refrigerate for 12-15 minutes to allow them to firm up slightly, making them easier to handle.
- Shape the Gnocchi: Lightly dust a clean, dry work surface with a small amount of additional almond flour. Take one chilled dough ball at a time (keeping the others refrigerated). Gently roll it on the floured surface into a long, smooth log, approximately 21 to 43-inch in diameter. Using a bench scraper or sharp knife, cut the log into bite-sized pieces, about 43-inch to 1-inch long. If desired, you can create traditional ridges by gently pressing the tines of a fork onto one side of each piece, or by rolling them over a gnocchi board.
- Final Chill: As you shape the gnocchi, arrange them in a single layer on the parchment-lined plate or baking sheet, ensuring they don't touch. Once all are shaped, cover loosely and return to the refrigerator for at least 25-30 minutes (or up to a few hours) to firm up completely. This helps them maintain their shape beautifully during cooking.
- Cook the Gnocchi: Bring a large pot of water to a rolling boil and add a generous pinch of salt (about 1 tablespoon for 4-6 quarts of water). Gently drop the chilled gnocchi into the boiling water, being careful not to overcrowd the pot – cook in 2-3 batches if necessary. Stir gently once to prevent sticking. Boil for just 1-2 minutes, or until they float to the surface. They cook very quickly!
- Serve: As soon as the gnocchi float, promptly remove them with a slotted spoon, allowing excess water to drain. Serve immediately tossed with your favorite keto-friendly pasta sauce, a simple browned butter and sage sauce, pesto, or a sprinkle of extra Parmesan cheese.
Notes
- To Store: Allow leftover cooked gnocchi to cool completely. Store in an airtight container in the refrigerator, preferably in a single layer or separated by parchment paper to prevent sticking, for up to 3 days.
- To Freeze (Uncooked): For longer storage, arrange freshly shaped, uncooked gnocchi in a single layer on a parchment-lined baking sheet. Freeze until solid (about 1-2 hours). Once frozen, transfer them to a freezer-safe bag or container, removing as much air as possible. Store in the freezer for up to 3 months. Cook directly from frozen, adding an extra minute or two to the boiling time.
- To Reheat (Cooked): The best way to reheat leftover cooked gnocchi is to lightly pan-fry them in a non-stick skillet with a little butter or olive oil over medium heat until warmed through and slightly crisped on the outside. Avoid microwaving, as it can make them overly soft or rubbery.
- Calories: Approx. 382 kcal
- Protein: Approx. 26.7 g
- Fat: Approx. 27.0 g
- Total Carbohydrates: Approx. 9.4 g
- Fiber: Approx. 3.5 g
- Net Carbohydrates: Approx. 5.9 g
You’ve GOT to Try These!
Honestly, these Viral Cloud-Keto Cauliflower Gnocchi have brought so much joy (and deliciousness!) back to my low-carb meals. They take a little bit of effort, especially that cauliflower-squeezing marathon, but the payoff in texture and flavor is just incredible. Whether you’re keto, low-carb, gluten-free, or just an adventurous foodie looking for your next favorite dish, I truly hope you give this recipe a whirl.
If you do make them, I would be absolutely thrilled to see how they turn out! Snap a photo and tag me on social media, or drop a comment below to let me know what you think. I can’t wait for you to experience these little pillows of joy! Happy cooking, everyone!
")
")


